
If there’s a professional leatherwork tool I never leave behind no matter the project I’m working on is the leather edge slicker or burnisher. This tool is hands down an important staple in every leathercrafters’ toolbox and here’s why, but first;
What’s a Leather Edge Slicker Burnisher?
The leather edge slicker burnisher is a professional leatherwork tool used to smoothen out or compress the fibers on the edges of your leather projects by friction to make your work a lot more professional. It’s a tool that requires little effort to use but gives tremendous results on leatherwork projects.
This short definition of what leather edge slicker burnisher is does not begin to describe what they can do. Their range of use is enormous, and the techniques you can use to apply this amazing tool is very easy. Keep reading to find out more!
Types of Leather Edge Slicker Burnisher
Traditionally, canvas materials served as tools for burnishing the edges of leather to make the edges nice and professional. The canvas was rubbed up and down on the edges of the leather causing the friction needed to burnish the leather. However, over the years, new forms of burnishers have been developed to make burnishing much easier and faster. Some of these common burnishers today include;
- The Hand Burnisher also known as the edge slicker
- The Drill Mounted Burnisher
- The Motor Burnisher
The Hand Burnisher/ Edge Slicker
The hand burnisher or the edge slicker is usually wooden but you can find some others made of plastic or glass. The hand burnisher usually has different sized ridges on them in which the leather fits while you burnish.
It’s a handheld tool you can rub on the edges of your products and after a few minutes, you will notice a shiny glassy layer on the edge of your work.
The hand burnisher is widely preferred by most leathercrafters because they are cheap and work quite well.
If you’re interested in getting a hand burnisher, I found this complete leather edge burnisher kit. You can check it out over here on Amazon! or for just a single hand burnisher check this one out.
The Drill Mounted Burnisher
The drill mounted burnisher also has the same results just like the hand burnisher but is much easier, faster, and you’d have no fatigue when you’re done. This is because a specially designed burnisher is mounted on a drill making the entire burnishing process very mechanized.
Both types of leather edge burnish are all great and will basically boil down to your preference, speed, and budget you’re willing to invest in a leatherwork edge burnishing tool.
Contrary to the hand burnisher, if you execute a lot more projects and would want to do your leather edge burnishings much quicker with the most professional outcome, you will be interested in the drill mounted burnisher.
I did a thorough search for the best and found the Dremel burnisher to be one of the best with great reviews. You can check out some of the reviews here or buy here if you’re interested in using the drill mounted type of leather edge burnisher.
With the use of the drill mounted burnishers, you will also want to get a couple of burnishing bits that you will fix on the drill before you burnish. I‘ve found this burnishing bit to be the best and it comes with different sizes of grooves tailored for different widths and leather ounces.
The Motor Burnisher
The motor burnisher is an electronically powered device you can bolt down to your workbench and has a sanding drum and a burnisher on either end. These are more of industrial burnishing tools but can also be used at home or a small studio.
The best thing about the motor burnisher is that it can do both sanding of the edges of the leather (which generally precedes burnishing) and then burnishing itself within a matter of seconds.
To use this device, simply run the leather over the revolving burnishing part. It’s really great because unlike the hand burnisher and the motor burnisher can be used on any length of leather items with no stress.
If you’re interested in the motor burnisher, you can check out this one on Amazon! with really great reviews. You will really want to check it out.
How is Edge Burnishing Done?
No matter the type of leather edge slicker burnisher you use, the process for edge burnishing is generally the same. Here are a few simple steps to do leather edge burnishing.
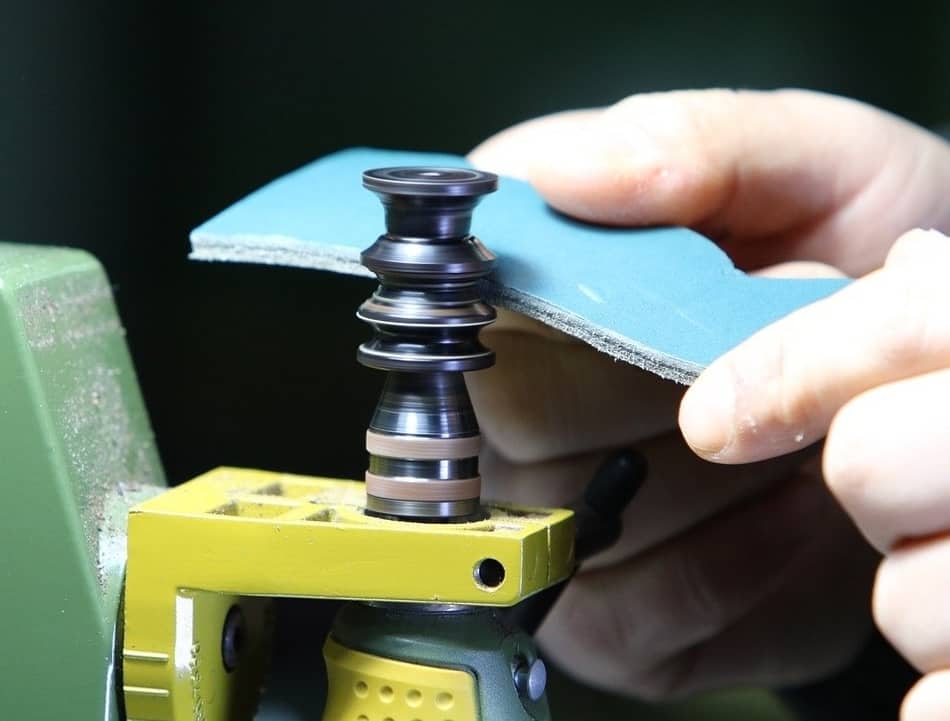
Step 1: Sanding
Sanding the edges of the leather to be burnished is one of the first steps in using a leather edge burnisher. You can sand using sandpaper to smoothen out the edge of the leather by knocking down all the bigger fibers and also removing excess glue especially in the case where you have joined two or more pieces of leather together and would want to get it on the same level.
So you keep sanding till you get a nice, smooth, even edge. You can use the standard 200 grit sandpaper, a sanding Dremel, or the sanding drum on the motor burnisher.
Step 2: Round the Edges with an Edge Beveler
After the edges of the leather to be burnished is evened out with sandpaper, now it’s time to bevel the edges of the leather as well using an edge beveler also known as edge shave or an edger. You can check out an article I wrote earlier on all you need to know about edge bevelers and The Edge Bevelers you can buy!
You can use a number 3 or number 1 size edge bevelers for this purpose to in case you’re unsure the size of beveler to use, you can refer to my previous article on The size of edge bevelers you will need to use for specific leather thicknesses or you can simply go with a size 2 edge beveler and it will also work just fine.
What the edge beveler will do is to give the tip edge of the leather to be burnished a nice rounded look and also prevent the leather from mushrooming as a result of the pressure from the leather edge burnisher.
Step 3: Burnishing
Now, here we get down to the main activity of burnishing the leather edges of the leather. This is by simply causing friction by running your edge burnisher on the edges of your leather.
After burnishing the leather edges will be darker and smoother when compared to the unburnished edges of the leather.
3 Techniques for Leather Edge Burnishing
There are various techniques for burnishing the edges of the leather and there isn’t one perfect way of doing it but instead finding the most convenient technique for you is all that matters.
The various techniques of burnishing leather depends on the type of compound you choose and the most common compounds include water, wax, and gum tragacanth.
Burnishing Method 1: The Water Burnish
The first burnishing technique, water burnish is probably the most important bare minimum you can do in terms of burnishing leather edges. As the name suggests, it involves the use of water. Here’s how it’s done.
- You start by dampening the edge of the leather you intend to burnish.
- With your slicker, create friction by running it up and down and in the process compressing the fibers on the leather edge.
- Optionally, after you have thoroughly completed your first round of burnishing, you can apply leather edge dyes to the edges of the leather before finishing off the burnish to enable the leather edge dyes to absorb very well into the leather.
The upside to using the water burnish method is that it’s really fast, easy, and almost free since you’re using water.
Burnishing Method 2: The Wax Burnish
The wax burnishing is an upgrade to the water burnish and adds an extra layer of smoothness to the edge of leather which is also glossier. The wax burnishing method follows the basic water burnishing process, after which you can run a block of beeswax over the burnished edge and then you continue with the burnishing with your leather edge burnisher slicker.
You can repeat the process of waxing and burnishing until you arrive at a satisfying outcome. The general result of this method is a much darker, water-resistant edge, and smoother edge when compared to the water burnish technique.
The wax method is really great because it protects the edge better. The only downside to this method is that it requires more effort for it to shine.
Burnishing Method 3: The Gum Tragacanth Burnish
The next method of burnishing leather edges is the gum tragacanth burnish. This method is executed using gum tragacanth also known as gum trag for short and I particularly find this gum trag eco-flo by Tandy leather to be the best for all gum trag burnishing methods. You can check it out over here on Amazon!
With this method, layers of gum trag is applied after water burnish is done. So once the water burnishing process is complete, apply a thin layer of gum trag on the edge of the burnished leather surface and use your leather burnisher to burnish over it. You can repeat several coats of gum trag on the edge and continue to burnish until you get the desired outcome you want.
Once complete, leave the gum trag to dry and you will get a nice, smooth finish on the edge of your leather item. When compared to the wax burnish, the gum tragacanth is much lighter and smooth.
The gum tragacanth is my personal favorite because gum trag is cheap, gives the leather edge tremendous protection and comes to a really nice shine.
Pro Tips on Using Leather Edge Slicker Burnisher
- As a general rule of thumb when it comes to burnishing leather, the longer you work on it the better it’s going to look.
- Always burnish in the same direction no matter the burnisher you’re using.
- It’s highly recommended you finish off your burnishing with some kind of a top finish on the edges of the leather to make them more durable once burnishing is done.
- It’s often a bit difficult when you have to do water burnish on a vegetable-tanned leather because it often stains it with watermarks so you need to be extra careful or you can simply use a neutral leather edge paint from Tandy leather instead of burnishing and risk having watermarks on your project.
- Both the wax burnish method and the gum tragacanth methods both produce a finer edge compared to the water burnish.
- When sanding before you start burnishing, make sure you sand towards only one direction so that you don’t mess up the fibers of the leather.
- When using a hand burnisher, always pick a groove that’s around the same width of your leather, apply only light pressure and work it back and forth till you start to see it darken and eventually beginning to shine.
- If your choice is the drill mounted burnisher, be sure to select the burnishing bit with the same width as your leather thickness.
- Always put your drill mounted burnisher on the lower setting and run it slowly with light pressure over the leather to avoid the leather from burning.
- When using the water burnish method, make sure the leather is damp but not wet or too dry. So you might have to go section by section so that you keep the consistency of how damp the leather should be.
- Always after burnishing, you would want to finish off by running a piece of canvas cloth over the leather edge to remove any bits and pieces of extra compounds and brings it to a nice high shine.
- When burnishing the edge of a long leather piece, like a belt, strap or handle, make sure to section it off and burnish the various sections the same amount of time.
Related Questions
Is beeswax good for leather?
Beeswax is a great material for leather and is one of the oldest leather conditioning treatments still in use today. It’s good for leather because it can be used to waterproof leather surfaces, lubricate threads for stitching leather, and used on leather as a resist for dyeing and staining.
How do you burnish the edge of leather with beeswax?
You burnish the edge of leather with beeswax by first dampening the edges of the leather with water and burnishing it for a few times and then rubbing beeswax over the burnish and then slickering it again. You can repeat the process of adding the beeswax and burnishing a couple of times before finishing it off by using a canvas fabric.
How do you smooth the edges of leather?
You can smooth off the edges of leather by sanding, beveling, or slickering with an edge burnisher. Basically what happens when you smoothen the edges of the leather is that excess fiber is removed from the edges of leather or causing the fibers to lie down by means of friction.