
Getting into the world of leatherwork can seem intimidating. Searching the web for tools, materials, techniques, and projects can give you endless results.
Although there are a lot of tips to keep in mind if you want to be successful in leatherwork, I’m writing this guide to help you with a simplified but the best information you will need towards becoming a pro in no time.
Leatherwork Tools and Materials
To do leatherwork, you’re going to need some gear. To make it easier for you, I will group the leatherwork gear into tools and materials
Tools For Leatherwork
What is a tool in leatherwork? Tools are the items you would need to make your leatherwork project.
To simplify the definition of what a tool is, just think of anything you use and after the leatherwork project does not form part of the finished work, that’s a tool.
I will categorize all the tools you will need for your leatherwork projects into Cutting tools, punching tools, working surfaces, decorating tools, striking tools, working surfaces, and Edge tools.
| Leatherwork Tools Category | Tools Name |
| 1. Cutting Tools | Round Knife Precision Knife Rotary Cutter Utility Knife |
| 2. Leatherwork Punching Tools | Rotary Punch Drive Punch Thonging Chisel or Lacing Chisel Awl |
| 3. Leatherwork Surfaces | Table Cutting, Punching and Stamping Boards |
|
4. Decorating Tools |
Stamping Tools Carving Tools |
|
5. Striking Tools |
Hammer Mallet Mauls |
| 6. Edge Tools | Edge Guide Wood Slicker Edge Beveler |
1. Leatherwork Cutting Tools
Cutting leather may seem like a relatively basic activity but there a lot of tools with specifics to cut leather. I have outlined the basic leatherwork cutting tools for your convenience.
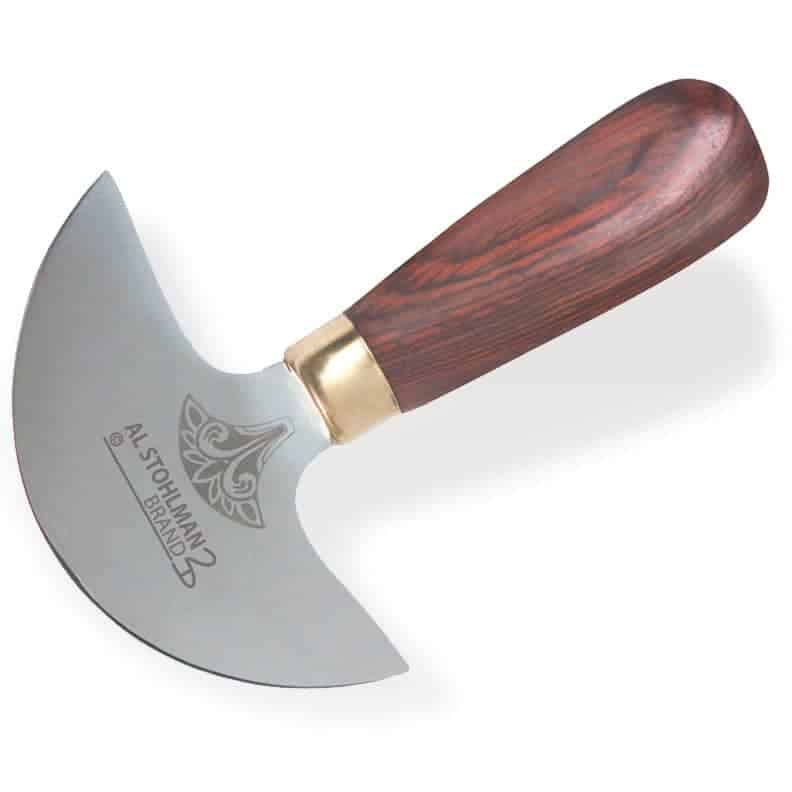
Round Knife
The round knife also known as the head knife is known to be the symbol of the leathercraft. Round knives are designed to let you cut into thick leather easily.
It is very easy to use. When you purchase your first round knife, all you will need to do is to sharpen it a little bit and you are good to go.
It is a general-purpose widely used knife very useful for skiving the edges of thick leather, cutting out basic shapes in leather.
With a bit of practice, you will be able to use the round knife without a metal rule as it’s very easy to control when cutting heavy leather.
You will be able to easily maneuver straight and curved cuts in a single slither like a pro with a round knife.
Watch a Video on how to Care and Use a Round Knife
Check out an article I wrote to see some of the best round knives available
Round knives vary in the amount of weight, size, and head they are designed. In this article, I give guidelines on what round knife you should be using for various Leatherwork projects, so go read that if you are wondering what kind of round knife to get.
Precision Knife
In addition to the round knife, you will need an interchangeable precision knife perfect for cutting less than 6-ounce leather.
The precision knife is lightweight that will give you precise cuts on small and intricate details or angles.
It is an important tool to begin your leatherwork with because you will be working on a lot of smaller projects in the beginning.

Rotary Cutter
Another Important leatherwork tool that will furnish your toolbox is the rotary cutter. As the name suggests, a rotary cutter rotates while it cuts through the leather.
It is good for cutting straight lines in thin leather.
You will find that the rotary cutter has a round metal blade that when triggered it is exposed for easy cutting.
The rotary cutter also has a contoured handle design with soft cushion for you to be able to hold it comfortably.
It is much safer to use because, it has a convenient locking device on it so the blade, when not triggered, is safely in-ward and not exposed.
The blade will be very easy for you to manage as it cuts both forward and in reverse.
As a beginner don’t be surprised if you find yourself using the rotary cutter tool quite a lot.

You can check out an article I wrote earlier about the 7 Best Fiskars Rotary Cutters (Plus How To Pick!)
Utility Knife
You are also going to need an all-round knife and this is where the utility knife comes in. The utility knives are all-purpose knives you will need for cutting any type of leather including the heaviest leather.
It is good for making shallow and straight cuts but the downside is that it is not good for cutting curves because of its geometry of the blade. So, your round knife will come in handy to give you those nice curves.
The utility knife is also known as box cutters or Stanley knives in America. The interesting thing about this cutting tool is that you may already have it in your house.
The main thing with a utility knife is to always keep the blade sharp. If you find that the blade has dulled up a bit, do well to sharpen or replace the blades. Working with a blunt utility knife can be very dangerous.
It is possible to cut leather in other ways, but they’re not as easy especially in instances where you will have to alternate between cutting tools. The utility knife if at hand will be very convenient and is absolutely a must-have cutting tool for your leatherwork.

You can check out an article I wrote earlier about the 7 Best Utility Knives For Cutting Leather!
2. Leatherwork Punching Tools
You are going to need to cut some form of holes in when making your leatherwork items. The easiest way to do that is with leatherwork punching tools.
Punching tools are used to make either slit or round holes on leather. They come in different sizes depending on how big or how spaced out you want your punches to be. As a beginner, these punching tools will do just fine for you.
Rotary Punch
You will be able to use one rotary punch to make different round or oval holes of different sizes. It is usually made of 6 revolving punch of different sizes.
To use it you simply rotate the to find the right size hole for your leather item. The best way to punch is to securely position the rotary punch where you need the whole to be created and give it a firm snap.
For the best result, you can put thin manila cardboard underneath the leather to get a clean punch.
It is a very cost-effective punching tool and having this means you will not have to carry a lot of punching tools around if you happen to travel and still want to practice or carry out some leatherwork,
The only problem with a rotary punch is that it is somewhat limited to where it can punch. The rotary punch can only punch about an inch and quarter from the edge of the leather item you will be punching.
You will be able to punch holes for fixing eyelets, rivets, thonging, and stitching. Pro tip! always polish your rotary punch with beeswax before punching.

You can check out an article I wrote detailing the Best rotary leather punch
Drive Punch
Since the rotary punch is limited as to where it punches, you will need a drive punch to be able to reach all the parts the rotary punch can’t reach.
It is great if you don’t want to spend a whole bunch of cash when you are starting out. You can buy a couple of them and it will take you through a lot of projects.
You can get the mini drive punch or the regular drive punch or both if you are not on a budget. Or better still, you can buy a size 2-4 and a size 8-9 and you will be able to do most projects without having to buy other punching tools in the initial stages of your leatherwork.
For you to use the drive punch comfortably, you will need to have a good punching surface like the poly cutting board.
To start your punching with a drive punch, you will first want to polish your drive punch quite a bit of a strop.
After polishing and shining off the sides of the punch, you then put a little beeswax on the part of the drive punch that punches.
If you ensure polishing and waxing your drive punch all the time before you do your punching, it will come out clean and much easier.

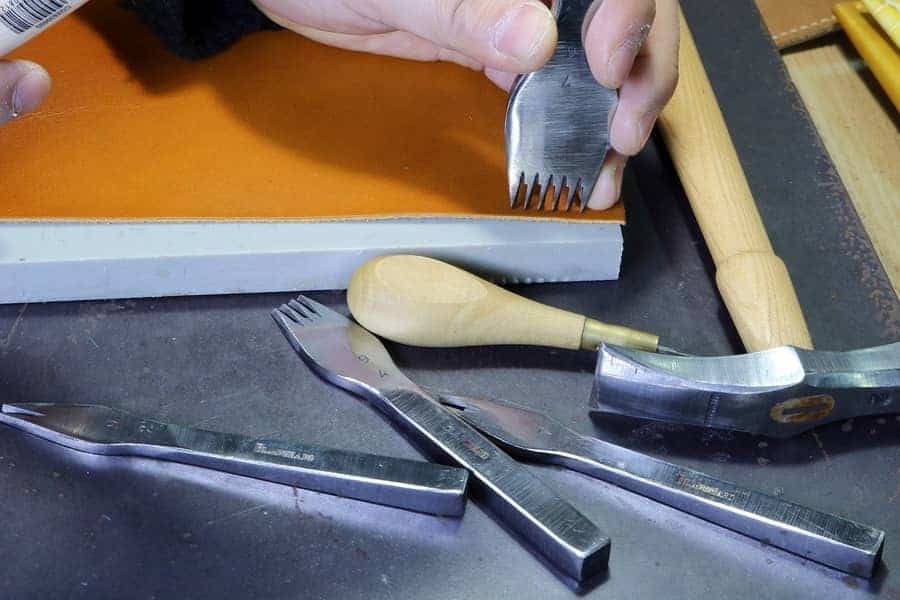
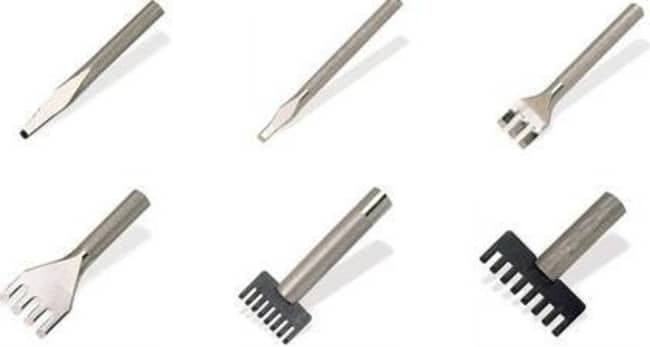
Thonging Chisel or Lacing Chisel
You will not always want to have a round hole when stitching leather. Sometimes the project you will be working on will require you to have slit holes.
The thonging chisel will come in handy. It is often confused with pricking iron. The thonging or lacing chisel is designed to make thonging and stitching much better and easier for you.
The chief characteristics you will notice with the thonging or lacing chisel is that it creates slit holes in the leather for thonging or stitching.
This type of leather punch comes with a number of punches ranging from 1 to 8. When choosing a thonging chisel, you will want to go for one with 6-8 punch and another with a single punch.
The 6-8 punch will help you get a much straighter stitch line while the single chisel punch will work through the tight corners.
Using the thonging chisel is totally beginner-friendly. You start by assembling all the parts of the leather you will be stitching together with an adhesive before punching the slit holes.
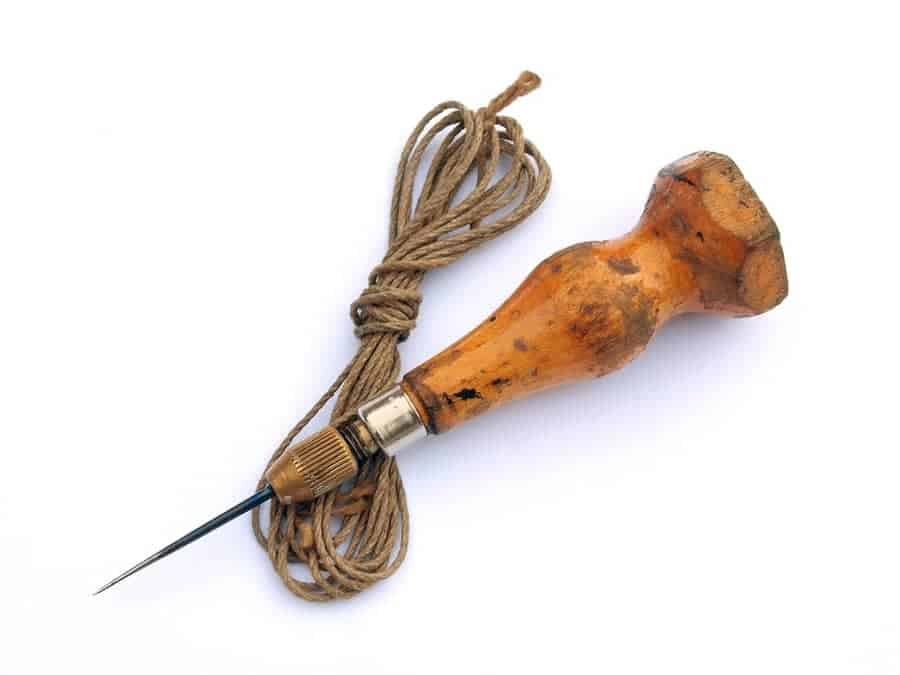
Awl
The next tool you will definitely must-have is the awl. You will see the awl have a piercing needle at one end and a rounded wooden handle that will fit your palm at the other end.
You will mostly use this leatherwork tool when stitching or marking out patterns on leather you will be cutting out.
Prior to stitching, the awl is used to create holes on the leather by just pushing the awl through a marked out area of the leather before the stitching needle is run through to make stitches.
You can also use the awl to widen already made holes in leather. Some awls come with needles of several diameters for you to choose from.
It is pretty much cheap and you will surely have to pick one up when you start out.
3. Leatherwork Surfaces
Working surfaces will be of great value to you. Both the veterans and beginners all need a surface to work on obviously. The working surface you choose when starting out will determine how fast or slow your other leatherwork tools and materials wear out.
Stretching Table
The stretching table will be your general support where you would assemble all other tools, materials, and equipment. It will also serve as your working surface.
The stretching table can be any durable table spacious enough. Most beginners start out using their coffee table and other living room furniture tables.
As you advance in your leatherwork, You will be able to have a much better set up for your leatherwork work area.
Cutting, Punching and Stamping Boards
For your convenience and proper care for your leatherwork tools, you will also have to get a flat board you will need beneath your leather while stamping, punching holes or cutting your leather.
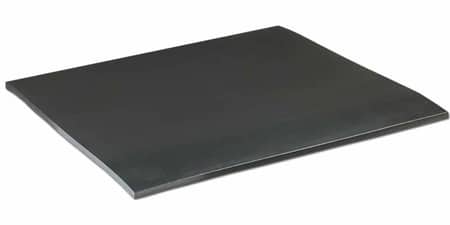
In leatherwork, you basically need 3 surfaces, a rubber board, a wooden board, and a slab.
The rubber board will be good for marking out and cutting your patterns.
When drawing or tracing out the pattern on the rubber board, it holds the paper or leather in place for you to make easy markings without the paper or leather sliding around.
When cutting, the rubber board will allow your cutting knife to sit well on it giving you a nice clean cut.
The rubber board also reduces the amount of sound produced by stamping and punching tools.
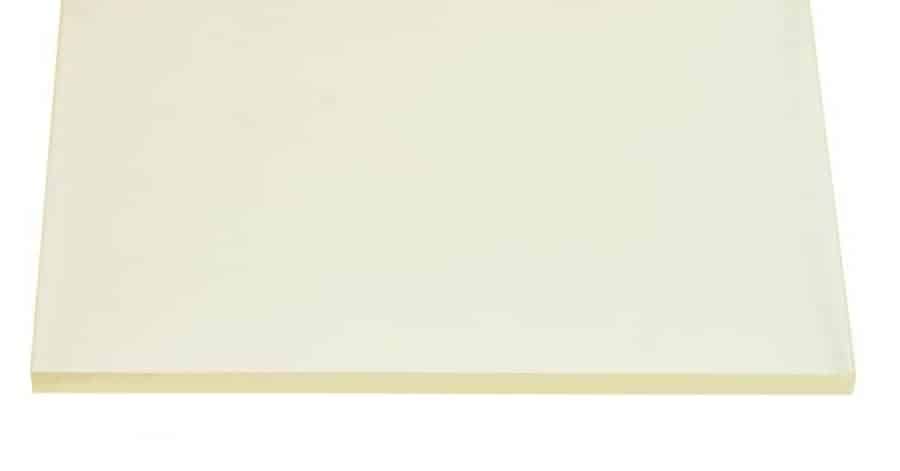
The wooden board is more or less like a cutting board but this will help you to make all your punching. The wooden board you buy will be perfect for your drive punch and you can use it for a really long time.
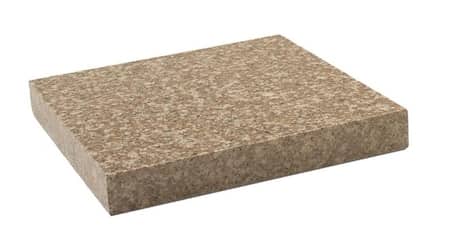
Last but not least, is the slab. The slab is a centerpiece of all your leatherwork surfaces. You will set all your leather findings such as the rivets, eyelets, grommets, press-studs and a whole bunch of other leather hardware.
You can also do tooling or stamping on the slab.
You can, however, use all three types of surfaces together. When starting out, your aim should be an all-purpose board that can handle stamping, tooling, and punching quite efficiently.
checkout an article I wrote on the 4 best leather work Surfaces.
Getting the wrong type of board can be bad for your stamping, cutting, and punching tools. For example, if a board is too hard, it will damage your stamping tools.
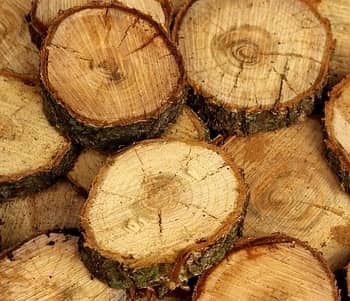
You may find some people improvising by using a wooden stump or block. It may be okay in the beginning, however, not too convenient in the long term.
4. Decorating Tools
Decoration is a vital part of leatherwork, so you will need to have some leatherwork decorative tools. The decorative tools in leatherwork are mainly a few stamping tools and carving tools.
Leather decorative tools are the items you will need to enhance the beauty of your leather products.
Here are a few important ones you can start with.
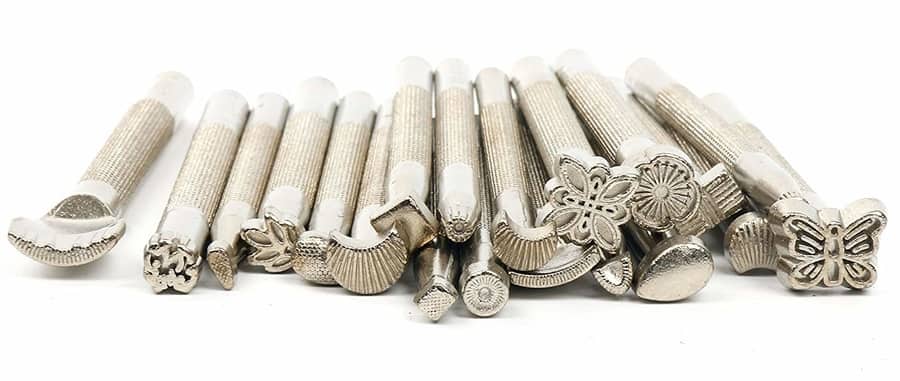
Stamping Tools
Leather Stamping tools are metal tools you will need when you want to create some decorative patterns on your leatherwork products. It comes in a wide array of designs and sizes.
You can combine some of its designs or you can use them in isolation. In fact, there are no rules of thumb. You just go crazy and creative with this one.
To use a stamping tool, you first dampen the leather surface with ordinary water and with the help of a wooden or plastic mallet, you stamp the design on the leather with a gentle hit.
You can check out an article I wrote earlier about the 10 Best Leather Stamping Tools: The Ultimate Guide Plus Tips
Watch a video on how stamping is done
Carving Tools
Carving tools I will honestly say are optional for a beginner but totally worth it to have. Carving in leather is when you apply various tools and techniques to create a design.
Carving in Leatherwork is more freestyle and basically depends a lot on how much mastery you have or developed.
If you will be interested in adding carving tools to your arsenal you can basically start with a Swivel Knife and a rough, smooth or textured bevel.
Watch a video on how Carving is done in Leatherwork
5. Striking Tools
Buying striking tools for leatherwork can be quite confusing and I’m pretty sure you might have noticed already. There are different classes of leather striking tools and they are hammers, mallets, and mauls.
A lot of leather artists starting out will ask the important question. Do I need a hammer, a mallet, or a maul?
The differentiation factor you will find among the three basic striking tools is the design and purpose. Let’s take them one at a time.
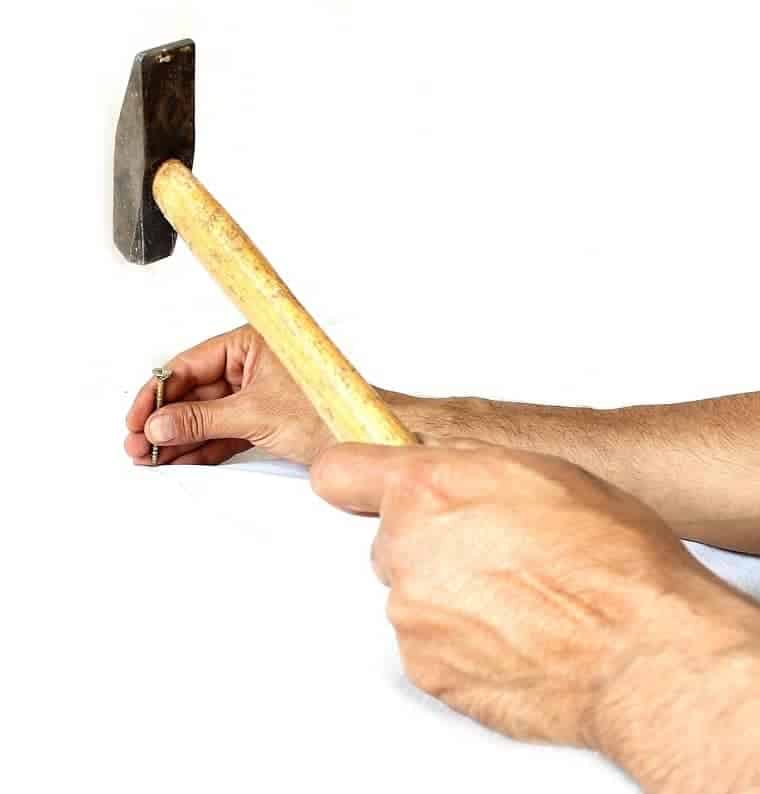
1. Hammer
Hammer is a striking tool that has a small metal head that is used to output blunt force on a surface.
What classifies a striking tool as a hammer you will notice is that hammers have a metal striking part with a crow or nail remover part aswell. Hammer also comes in a specific array like the leatherwork harmer, saddlers hammer, or a french hammer.
You can use a hammer in leatherwork to set rivets, tap a seam flat, strick and remove nails when stretching leather.
When a hammer is used for example for stamping, you will find your stamping tools developing mushroom head and in no time will be damaged.
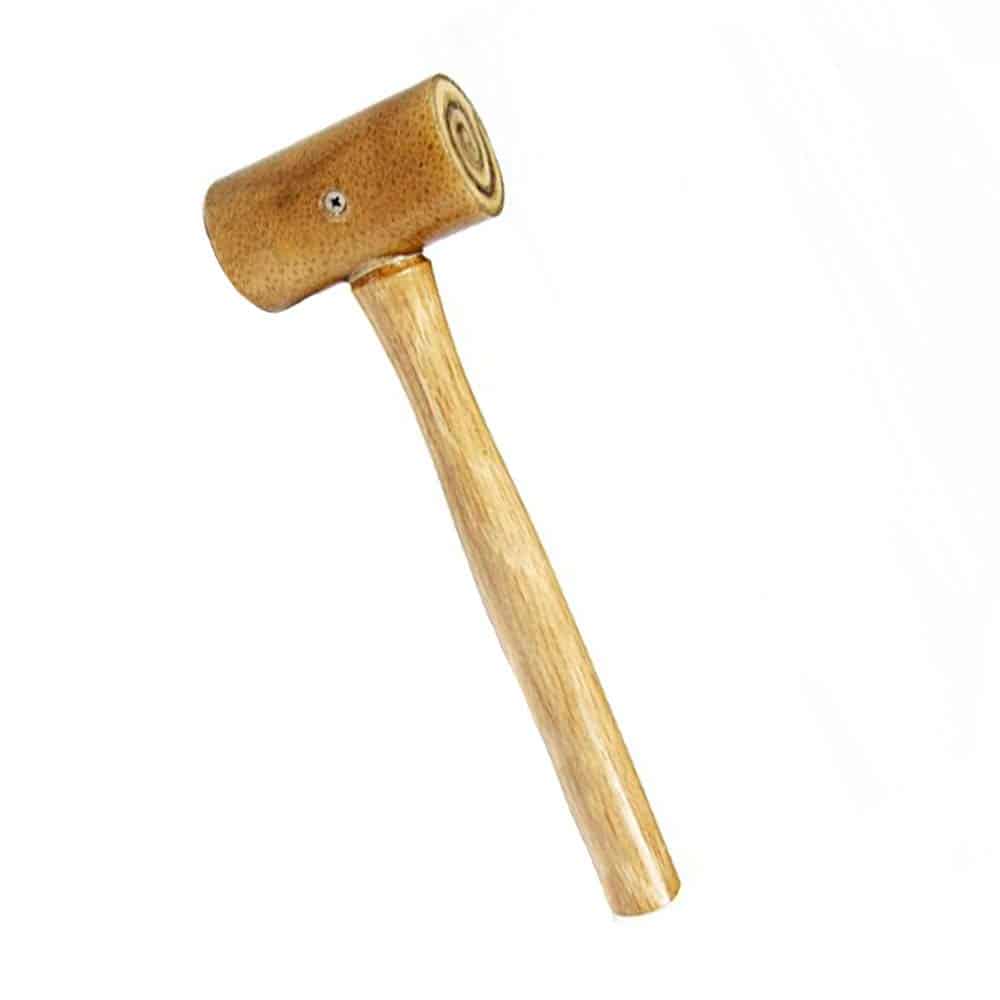
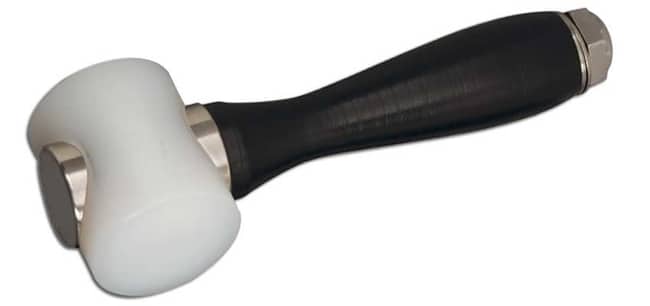
2. Mallet
A mallet is basically a type of striking tool with a large, soft head used to strike leatherwork tools when stamping or tooling without causing any damage to the tool.
You will also notice there is a wide range of mallet styles, sizes, and weights on the market which are designed for different purposes.
The materials used for mallets vary. Some common choices are wood, rubber, rawhide, or plastic. Mallets are made from such materials so that they don’t damage your leatherwork tool.
Many leather artists also make their own mallets from wood tailoring it to their specific needs. But for a beginner, you will want to get a plastic mallet.
3. Mauls
Mauls are known to be the king of striking tools because of their durability and less energy exertion on them. Mauls have a good balance and will allow you to make better strikes on your tools.
Mauls although similar to mallet have more functions. It can be used on stamping, tooling, and on drive punches.
It is a bit difficult to get used to using mauls because you don’t strike like the conventional hammer and mallets. Mauls require you to rocking your wrist to make a strike while mallets and hammers require a whole arm action. But when you get used to using mauls, you will have such a great time using it for a long time.
6. Edge Tools
On the ends or edges of your leather projects, you will need tools that will help give your leatherwork a good finish. These are tools you will mainly use for the ends of your works. Let’s look at a couple you might want to start with.
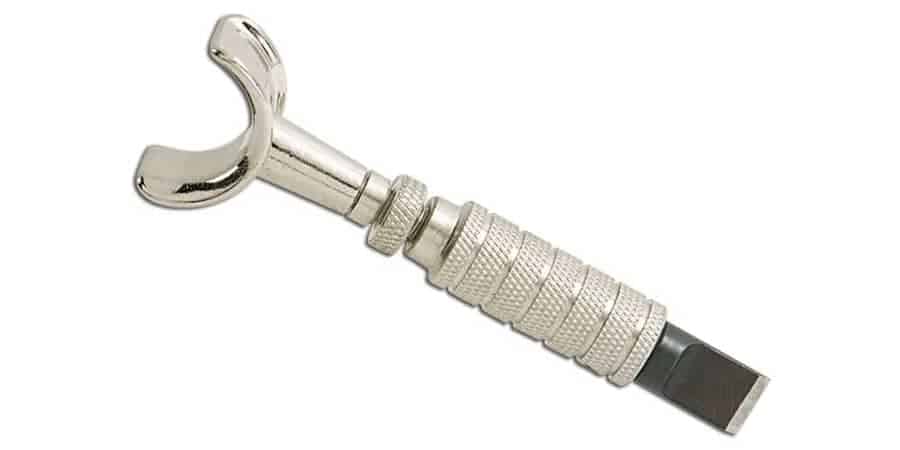
Edge Guide
The edge guide is absolutely fantastic and you will definitely want one. It is vital because you will need to create a guide for yourself when stitching especially as a beginner.
You can improvise by using dividers or compasses in place of an edge guide but working with an edge guide makes stitching things so much easier.
Edge guides are simple to use. The way you use it is by running it by the edge of the leather item you are producing. It will create a nice guide as to where your stitches are going to be and at the same time create a groove in which the stitches will sit giving your leatherwork clean and professional finish.
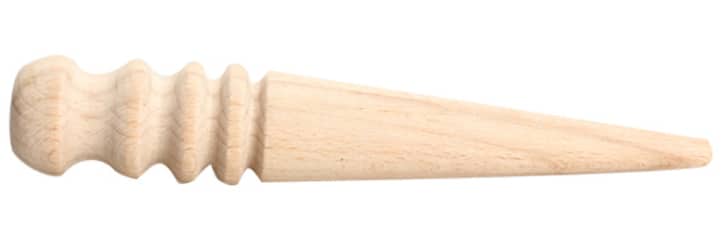
Wood Slicker
The wood slicker is a very simple low maintenance leatherwork tool. It is just a piece of wood with a couple of grooves or channels in it. The channels are of different sizes so that it can be applied with any size or thickness of leather you use.
To use a wood slicker, you dampen the edges of the leather item with water or saddle soap then you slick the edges of your leather item with the wood slicker.
The friction from the slicker will cause the edge of the leather to seal of nicely and glass up beautifully. This will make your leatherwork products to look very good for a very long time.
You can have a wood slicker for years and years.
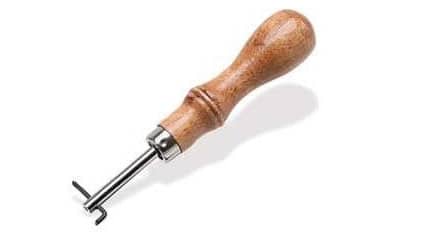
Edge Beveler
The edge beveler is a leatherwork edge tool used to finish off the edges of leather to revote mushroomed corners on the edges.
The tool is shaped with a groove in it and all you do is to angle the groove to sit on the edge of the leather and then run it applying constant pressure along the sides.
Doing this will slightly peel off the mushroom edges giving your leather a good round edge finish.
As a beginner, you can get a number 0, 2, and number 4 edge beveler. You will be able to use the number 0 edge beveler for really small and precise edges on a wallet or purse while you use the number 2 or 4 for all other projects.

Materials For Leatherwork
Just like needing tools for your leatherwork adventure, you will also need materials. Materials are the things you use for a leatherwork project and when you’re done forms part of the finished product.
Leatherwork material you will need for starters are:
| Leatherwork Materials for Beginners |
| Leather Dyes Adhesives Thread Cleaners, Conditioners, Wax, and Polish |
There are so many materials in leatherwork you will explore later but this is just to get you started. Let’s start off with leather.
Leather
Leather is the primary material used in leatherwork. There are different kinds of leather mainly natural leather and synthetic leather.
Natural leather is a much more versatile material and its abilities will simply blow your mind. Natural leather can be formed, molded, carved, creased, dyed, and a whole bunch of other great techniques.
Check out an article I wrote to read more about what leather is.
Using leather is vital in leatherwork as the craft is basically themed according to the material used. In this article, I give information about leather, how it is made, and some characteristics of leather. So go read that if you seeking some answer on leather as a material.
Natural leather can be a bit price when starting out but all you will need is a 3-5 ounce vegetable-tanned leather and that will be good to get you started for all the basic leatherwork projects you will start with.
Go check out an article I wrote on vegetable-tanned leather and why its a great beginner choice.
On the other hand, there is synthetic leather. They are great alternatives to natural leather. They come in different sizes, patterns, quality, and design.
Leather Treatment Processes (Tanning)
The synthetic leather is chemically made and contains only synthetic materials.
Natural leathers, on the other hand, are obtained from different animals and must be treated through a process called tanning to turn the fresh animal skin into leather.
The tanning process is important because it prevents the leather from decaying or decomposing.
There are different tanning processes for turning raw skins into leather but the most common types you will need to know about are;
- Vegetable tanning
- Chrome Tanning
Vegetable tanning is the oldest tanning method that uses plant extracts to turn animal skins into leather. It’s an organic way of tanning and results in remarkable types of leather the veg-tanned leather.
So basically, any type of animal skin can be removed and tanned this way. The downside is, it can take about 60 to 90 days to complete thus the much faster tanning method chrome tanning.
Chrome tanning is an alternative tanning method in leatherwork that makes use of chromium salts to treat fresh skins into leather.
Chrome tanning is fast and can be done within a few hours.
The take away here is not to teach you how to tan leather but just for informational purposes.
All leather tannings are done by a leather tanner and all you do is to go to your preferred leather outlet and buy the type you want. Veg-tanned leather is most suitable for beginners.
There are, however, other types of leather tanning methods. There is oil tanning, mineral tanning, combination tanning, etc.
Types of Leather
Leather also comes in different types for you to choose from. During the processing of leather, it is split into layers and these layers are:
- Full-Grain leather
- Top Grain leather
- Genuine leather
- Bonded leather
Full-Grain Leather
Full-grain is the first layer of the skin of the animal. It includes the parts where the fur off the animal grows. Since this part is basically the first defense point of the animal, it is much stronger, though, and the most durable leather you will find.
Full-grain leather is all-natural leather with no corrections what-so-ever.
Full-grain is more expensive and is the highest quality of leather you can ever find.
The downside to full-grain leather is that it turns out to be blemished a lot as the scars, bites, and all the abrasions the animal suffers is shown.
Top-Grain Leather
Top-grain is the second layer actually and this layer although not as durable as the full-grain is much better looking because the blemished layer is buffed to remove all imperfections of scars, bites, etc.
It is a much better version of full-grain but is slightly less quality. The top grain is widely preferred obviously for how it is worked to look better and at the same time retaining some amount of naturalness in its leather look.
It is also given a slight coating finish to make it somewhat water-resistant.
Genuine Leather
Genuine leather ironically is the least quality leather so don’t get tricked. Overall, genuine leather doesn’t last as long compared to full or top-grain leather.
It is cheap and good for the underside of products that do not get a lot of wear and tear.
Bonded Leather
And there is the bonded leather. The bonded leather is made from the shavings of leather bonded together with an adhesive on fabric.
This type of leather is of low quality because it basically will contain just about 10-20% of leather.
It is mainly good for concealed parts of the furniture like the back or underside.
You should check out a previous article I wrote about bonded leather here.
Leather Weight or Thickness
The weight of leather is measured in ounces (oz). The usual weights of leather you will have can range between 1to 16 oz.
For beginners, you will want to go in for 1-2oz for lining leather items, 2-3oz for leather projects that you will have to do some forming and embossing, 4-5oz for your regular wallets and purses, and 8-9oz for many heavy-duty projects like knife sheaths and belts.
Go check out an article I wrote on leather weights and its uses.
These four categories of leather weight will be suitable for all your projects starting out. You could also explore other weights and thicknesses and find what you like.
Dyes
This may be considered optional depending on what you want to achieve with your leatherwork projects. I also know no one wants his or her leatherworks to have only one boring color so dyes come in handy.
Leather Dyes give color and character to the leather. It is a way of decorating leather with dyes.
Leather dyes are soluble pigments when applied to the leather sinks into the pores of the leather.
Leather dyes are great because you still get to have the natural textures of the leather after it is applied.
They already come prepared and you can grab one from any good leatherwork store near you.
Leather dyes can not, however, dye synthetic leather. Mostly with synthetic leather, it is given colors during the leather making process.
Adhesives
You are going to need to put your leather pieces together. The easiest way of doing this is by using a leather adhesive.
You can find so many adhesives on the market but what you really need are just two types. You will need white glue and contact cement.
You will want to use the white glue when you are just tacking leather prior to sewing or stitching. This helps to hold the leather together while you stitch or sew.
The contact cement on the other side will be used when you will only need to Join leather permanently without sewing or lacing.
Contact cement can hold two pieces of leather as one very well especially when you apply the adhesive on both sides you are gluing.
The contact cement is also able to join leather from the grain side of the leather. With this, all you do is to scratch the grain surface a bit before applying the adhesive to both sides of the leather.
Best practice with contact glue is that after you have applied the adhesive, you will need to leave the glue to dry for about 10 to 15 minutes before putting it together.
Thread
You will mostly do some stitching after you have used an adhesive. This is to give the leatherwork an extra touch of class and durability.
Threads also come in different sizes and types but the standard thread you will need for almost all your leatherwork projects is a 100% polyester thread.
As for the numbering of thread sizes, it varies from brand to brand. So do well to check with the leather shop near you and tell them what your project is and they will surely help you out.
If you happen to shop at Tandy leather, then you can get the 92 weight 100% polyester thread.
You will be able to use your chosen thread to make saddle or machine stitches on your leatherwork.
Conditioner and Cleaners
This you may also consider optional. After you successfully complete your projects, you will need to clean and condition the leather product to kick start it for the user.
Cleaners and conditioners are materials you will need to from time to time remove dirt and nourish your leather items.
The leather cleaners are mild soaps while leather conditioners have rich oils that when applied to the leather help to restore the natural oils in leather after cleaning.
Cleaning and conditioning leather is done not so frequently Just about once or twice a year.
Since there are different types of leather, that is natural and synthetic leather, there is also different conditioners and cleaners for the different types of leather.
Do well to specify to the local shop attendant or read carefully the product description when you are buying online.
Overview
The number of tools and materials needed for leatherwork may be slightly more and sophisticated in other trades, but on the bright side, all you need is a toolset worth not more than $200 and you will be able to take on numerous projects throughout your life. So just think of how much money you save there!
There’s no need to overspend as a beginner. You don’t need to have all sorts of different tools. Start with a few. You’ll get more over time as you continue to enjoy the hobby.
Leatherwork Techniques
There are several techniques in leatherwork you will eventually learn with time. Some of these leatherwork techniques include Cutting, dyeing, gluing, stitching, thonging, burnishing, decorative techniques, and so much more.
Check out an article I wrote on 8 interesting leatherwork decorative techniques.
You might even develop a couple of your own leatherwork techniques but here are some basic leatherwork techniques you could start with.
- Dyeing Techniques
- Gluing Techniques
- Burnishing Leather Edges
- Stitching
1. Dyeing
2. Gluing Techniques
3. Burnishing Leather (Edge)
4. Stitching
Conclusion
This guide should have everything you need to know to get started in leatherwork. There are a lot of leatherwork communities, forums, and blogs out there with more information to help you improve.
Be open to learn from all the resources around, and once you gain experience or tricks, be willing to help others too.
Just enjoy your journey on this newfound hobby or career and you will see how delightful leatherwork is. 🙂