
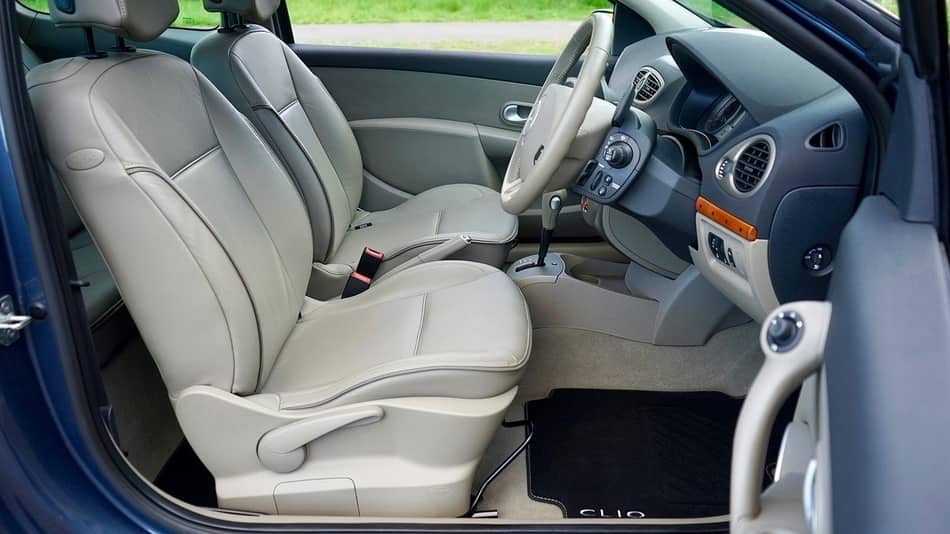
It’s very easy to get motor oil spilled in your leather boots, shoes, bike, or car seats. Although leather thrives when it’s oiled from time to time, you may not want used motor oil lingering on your leather items. So in this article, I’m going to show you a couple of ways to safely and effectively remove motor oil from your leather items.
So how do you remove motor oil from leather? The 6 ways to remove motor oil from leather are:
- The Oil Stain Remover Method
- The Talcum Powder Or Baby Powder Method
- The Motor Oil Staining Method
- The Leather Oil Method
- The Rubbing Alcohol And Dyeing Method
- And Leaving The Motor Oil To Gradually Fade Through Use
Motor oils do not break down with water alone and so you would have to try a bit harder to get motor oil stains out from your leather items. To learn the details on how to remove motor oil from leather keep reading this article. But first, let’s take a look at some important tips to keep in mind.
4 Important Factors To Consider Before Removing Motor Oil Stains From Leather
Unused motor oil isn’t actually bad for leather as it can be used to darken and give leather heavy-duty treatment.
But just like any other oil stain which tends to leave behind a dark oily spot, you would want to remove or mask such oil spots whether from used or unused motor oils or cooking oils – so as to have a nice even leather surface without any stains.
However, you will generally want to remove used motor oil spill from you leather items due to how unfriendly it is to leather.
You can check out an article I wrote earlier on some of the negative effects used motor oil has on leather.
Generally, motor oil is not like most of the oils you would have at home like coconut oils, vegetable oils, etc – in terms of how it stains leather. So the approach to removing any motor oil from leather should be targeted towards;
- Removing the motor oil stain itself
- Removing any toxins that may have been deposited onto the leather from the motor oil
- Removing the strong smell of the motor oil
- And finally, replacing the essential oils leeched out of the leather due to the motor oil stain.
Now let us head over to the details of how to thoroughly and safely remove motor oil stains from leather.
1. The Oil Stain Remover Method
If your leather item gets stained with oil, the obvious solution is to use an oil stain remover.
As obvious as this solution is, there are a variety of oil stain removers out there and it can be a daunting task picking out the best one for the best results.
One of the most effective products I have personally tried and tested that does a great job of removing all kinds of oil stains including motor oil is the Avel Hussard Oil Stain Remover.
There are a lot of other similar oil stain removers on the market that you can go for. This is not a sponsored post by Avel Hussard but the Avel Hussard Oil Stain remover is a product I have personally tried and loved.
An interesting discovery I made using the Avel Hussard Oil Stain Remover is that it works just like talcum powder will. So in the next point, I will share how to use talcum or baby powder if you do not want to spend cash buying oil stain remover.
This is not to say getting a specially formulated oil stain remover like the Avel Hussard is a waste of money.
It has its advantages and one of the main benefits of getting the Hussard oil stain remover instead of using talcum powder or baby powder is that the Avel Hussard Oil Stain Remover a powdered version spray in a can.
Because the Avel Hussard comes in a spray can it is a lot easier to apply and to precisely target specific oil stain spots on your leather goods. Plus it’s versatile and can also be applied to your clothes when gets oil stains too.
So for this method, I’m going to base my application guide on using the Avel Hussard Oil Stain Remover. It comes with its own application procedures but here’s how I personally apply it to remove motor oil stains from leather items.
Things Needed:
- Paper Towel or Tissue Paper
- Oil Stain Remover (If possible the Avel Hussard Oil Stain Remover)
- A Clean Cloth
- Leather Cleaning Brush
Pro Tip: You might want to carry out this method outdoors especially if you have a massive motor oil stain on your leather.
Procedure:
Step 1:
Blot up any excess motor oil stain. You would want to do this as soon as the leather get stained.
This will depend on how much motor oil stains that gets on the leather.
You can use paper towels, napkins, or tissue paper to blot up as much of the oil stains as possible.
Be very gently and ensure you do not rub the oil to avoid spreading the oil over the leather.
You would particularly want to blot as much of the motor oil from the leather as quickly as possible – that is when the oil is fresh or as soon as the motor oil stain happens.
Step 2:
Spray the oil stain remover on the motor oil-stained spot.
Before you spray, make sure to shake the spray can very well.
Since the Avel Hussard Oil Stain Remover comes in a spray can, you would want to hold it at a distance less than a foot away or about 25 cm away from the motor oil stain spot on the leather.
Now spray the oil stain remover onto the motor oil stain. You would want to give each motor oil stain about 2-3 puffs.
The distance is very important so that you do not oversaturate the leather.
Step 3:
Let the product sit on the leather for about 2-3 hours. You can as well leave it on the leather overnight.
There are a couple of signs you will begin to notice to indicate the application is working. Some of these are;
- The dark motor oil stain will start to turn into a white powder
- The powdery substance may begin to crack and peel
Step 4:
Check if the motor oil stain is gone or if there’s a substantial improvement. You can do so by peeling off potions of the powdery patch.
If you find it hasn’t quite removed a lot of the motor oil stain like you would want, you can give it an additional puff and wait another 2-3 hours.
Longer wait times are perfect to give the oil stain remover enough time to work.
Step 5:
Brush off the powdery residue. After you have patiently waited for the oil stain remover to work, use a soft clean brush to brush off all of the powdery residues.
You would want to maintain a back and forth motion just like you would when polishing a shoe.
Keep at it until all of the powdery residue formed after you have sprayed the leather is completely removed.
As I have mentioned before, you would want to do this particular step outside as the fine powdery residue will start to fly all over. So you will need a place with good ventilation.
Step 6:
Wipe the leather with a damp rag or cloth. Dampen a soft clean rag with ordinary water. Emphasis on damp!
Wipe the surface of the leather to get rid of any remaining powdery residue.
Step 7:
Leave the leather item to air-dry. Voila!
One important thing to keep in mind is that using oil stain remover may or may not work like magic but one thing that is guaranteed is that using an oil stain remover is definitely going substantially draw out a lot of the motor oils from the leather and will greatly improve the general appearance of the leather item.
2. The Talcum Powder Or Baby Powder Method
If you’re on a budget and cannot buy an oil stain remover, Talcum powder or baby powder also works very well with results almost similar to what you would have with a specially formulated oil stain remover like Avel Hussard Oil Stain Remover.
So here’s how you use talcum powder or baby powder to safely remove motor oil stain from leather.
Things Needed:
- Talcum Powder or Baby Powder
- Leather Cleaning Brush
- Soft Clean Cloth or Rag
- Saddle Soap
- Leather Conditioner
Procedure:
Step 1:
Blot up the motor oil stain from the leather with a paper towel or tissue paper.
Step 2:
Apply a thick layer of talcum powder or baby powder over the parts of the leather with the motor oil stains.
Step 3:
Leave the application overnight.
Step 4:
Brush off all talcum or baby powder residue. You can use a leather cleaning brush or a dry clean rag.
Step 5:
Clean the leather. Dampen your cleaning brush or rag with water and rub it over saddle soap and bring it to a nice lather.
Now use the lathered brush or rag to scrub the surface of the leather. Make sure you are as thorough as possible.
Step 6:
Use a dry clean cloth to wipe off any saddle soap residue from the surface of the leather item.
Step 7:
Condition the leather with a leather conditioner to restore any essential oils that may have been lost through the oil stain removal process.
Tip: You can repeat steps 6 and 7 one more time if you’re not satisfied with the initial results.
3. The Motor Oil Staining Method
The motor oil staining method is one of the very first methods I experimented with when I set out to research on how to deal with motor oil stains on leather.
This method involves using unused motor oil to stain the entire surface of the leather item to help mask the original stain on the leather.
The real challenge was, as I learned, was finding out if you could use the staining method if the leather item was stained with used motor oil.
Drum roll, please! You can actually use the unused oil to stain leather boots, shoes, bags, car, or bike seats if it has been stained mistakenly or purposefully with used or unused motor oil.
Here is a step-by-step guide on how to properly stain your motor-oil-stained leather items.
Things Needed:
- Unused Motor Oil
- Leather Cleaner
- Leather Conditioner
- Microfiber Cloths
- Tissue Papers
- A Pair of Rubber Gloves
Procedure:
Step 1:
Put on your pair of rubber gloves.
Step 2:
Blot as much of the motor oil from the leather as possible.
Start by pushing the tissue paper or paper towel gently but firmly over the motor oil stain on the leather.
You would want to blot out the motor oil when the stain is fresh so that it’s possible to pull out as much of the motor oil stains.
Make sure not to rub the motor oil in on the leather surface as this can cause the oil stain to spread.
Step 3:
Prepare the leather for staining. The next step is to ready the leather for the staining process.
Here, you will remove laces, loosen straps, and generally ensuring the stain will reach every inch of the leather article.
Step 4:
Brush off or wipe off any form of loose dust, dirt, or debris from the leather.
Step 5:
Clean the leather with saddle soap.
This is a very important step in the oil removal process. This is generally useful to remove any form of toxins deposited on the leather from the motor oils.
Bring your saddle soap to a nice foamy lather over a damp cleaning brush and then begin to scrub the surface of the oil-stained leather item to remove or clean as much of the oil stains and any other form of dirt on the leather.
This will actually help to remove the majority of the motor oil stains from the leather and you should begin to see the oil stain parts of the leather lighten at this point.
Make sure to wipe off any excess soap residue from the leather after you’re done cleaning the leather with the saddle soap.
Step 6:
Leave the leather item to air-dry in a cool dry place.
Step 7:
Now dampen your microfiber cloth with unused motor oil and start to oil the leather item.
You can as well use your hand to apply the motor oil to your leather item. The benefit of using your hand is that you will be able to generate some heat with your palm as you apply the motor oil which will also help in better penetration and saturation.
You would also want to saturate the leather as much as possible and ensure your application is as thorough as possible.
Step 8:
Buff the surface of the leather.
With the help of a clean and dry microfiber cloth or lint-free rag, begin to buff the surface of the leather.
This will help remove any excess motor oil from the leather surface and introduce a nice subtle shine.
Step 9:
Polish the leather.
If you want that extra shine, you can use an unused soft shoe polish brush to polish the surface of the buffed leather.
4. The Leather Oil Method
If you do not have an unused motor oil or you generally find the Motor Oil Staining Method a bit much due to its smell or any other issue, here’s a great alternative for you.
You can simply use any leather oil or your regular leather oil for this process. Here’s how you go about it.
Things Needed:
- Tissue Paper
- Leather Cleaner, Saddle Soap, or Dish Soap
Procedure:
Step 1:
As usual, you would want to blot up the oil from the leather if the motor oil stain is fresh.
You can simply use a paper towel, tissue, or rag to press gently against the motor oil stains on the leather.
Step 2:
Clean your leather item with a good leather cleaner. You can also use saddle soap or a dish soap.
Simply make sure to bring your cleaner to a nice lather and use a rag or leather cleaning brush to scrub the leather.
You want to make sure you’re scrubbing the entire surface of the leather. You do not want to end up with an uneven surface of the leather by cleaning only portions of the leather with the oil stains.
Meaning you will have to clean the entire leather surface – even parts without the motor oil stains.
Step 3:
Dry off the surface of the leather with a damp misty cloth to remove all soap residue.
Step 4:
Leave the leather to air-dry in a cool dry place.
Step 5:
Now the main activity! Load a substantial amount of mink oil on your rag or microfiber cloth and start to saturate the entire surface of the leather.
Continue to apply the mink oil and bring the rest of the leather to be the same as the parts of the leather with the motor oil stains.
You repeat the mink oil application until you’re satisfied with the appearance of your leather.
Tip: Your leather is going to look a lot darker than its original color when you use this method.
5. The Rubbing Alcohol And Dyeing Method
The rubbing alcohol and dyeing method is a great way to remove motor oil from leather.
In this method, what you’re simply going to do is to use rubbing alcohol to pull out the motor oils even if it has sunk deeply into the pores of the leather.
After which you can then dye the leather using leather dyes.
Here’s a quick step-by-step guide on how to use the rubbing alcohol and dyeing method to remove motor oil from leather.
Things Needed:
- Rubbing alcohol
- Leather dye (Preferably Fiebing’s Leather Dye)
- Microfiber cloth
- Paper towels
- Leather Protector (Preferably Fiebing’s Black Roselene)
Procedure:
Step 1:
If the motor oil stain is fresh, blot it with some tissue papers.
Step 2:
Load a lint free towel, rag, or microfiber cloth with a liberal amount of rubbing alcohol.
Step 3:
Begin to rub the stains and once you’re through rubbing the oil stains, rub the alcohol on the entire surface of the leather.
As indicated above, the rubbing alcohol will help to pull out as much of the motor oils as possible even if it the leather has been stained for sometime.
The rubbing alcohol will go into the pores of the leather and strip the oils away.
While this is generally bad for leather it’s a great way to remove most of the motor oils that have stained the leather.
The application of the rubbing alcohol is also perfect as it also removes any form of waxes, body oils, polishes, etc from the leather so that the leather dye can penetrate the leather evenly for the best results.
Step 4:
Wait a few seconds to about a minute for the rubbing alcohol to evaporate or dry before moving on to the next step.
Step 5:
Now take your dye applicator and load it with your leather dye.
If you’re going to be using my recommendation for leather dye (which is the Fiebing’s Professional Oil Leather Dye) it comes with a cool applicator and one of the best things is that you can use it directly without the need to dilute it.
Apply the dye as liberal and as evenly as possible. You would also want to do it quickly to get the best results.
You can apply several coats of the leather dye until you’re satisfied with the look of the leather.
Step 6:
Leave the dyed leather to dry thoroughly. You will be looking at 3-4 hours of drying time.
You can as well leave the leather overnight so that the leather gets the best dye penetration.
Step 7:
Conditioner the leather. Put some leather conditioner on a rag or microfiber cloth and begin to rub it over the surface of the leather.
This will help to rub off any surface dye and also help to evenly spread out the dye over the surface of the leather.
It will also give the leather a nice and smooth feel.
Pro Tip: If you notice any missed spot after the dyeing process, you can always re-dye and re-condition.
Step 8:
Leave the leather to air-dry again for about an hour or two.
Step 9:
Add a protective coating to prevent the dye from rubbing off. A good example of a product you can use for this is Fiebing’s Roselene.
In addition to giving the leather a protective coating, it’s also going to give the leather a medium to high gloss shine.
You can do this by loading your sponge with some amount of leather protector and then applying it evenly on the leather surface.
Depending on how much high gloss shine you want you to apply more or less leather protector.
For me one light coat of Fiebing’s Roselene always does the trick for me.
Step 10:
Buff the protective coating until it’s completely dissolved.
Step 11:
Leave the leather to now dry for about an hour. Done!
Pro Tip: For optimal results, it is best to be very patient and do every step in this method on a daily basis.
6. Leave The Motor Oil To Gradually Fade Through Use
Have you heard the saying “sometimes the best solution or smartest thing to do is to do absolutely NOTHING”?
This is essentially what this method is about. You do almost nothing and leave the stain for time to take its course.
This is more of embracing the stain rather than a fix. But hey! Don’t skip just yet!
Why? because there are a lot of benefits to embracing the stains your leather items takes up with time.
Some of the major benefits to leaving stains on your leather items without trying to remove them include:
- Reducing the chances of making the stain worse
- Having to patronize expensive stain removers that may not work
- Employing expensive professionals
- Leather will develop a beautiful patina over time with every stain acting as a timestamp
While stains like that from used motor oils can be very heartbreaking, one of the best practical solutions I have often found when it comes to dealing with such stains on leather is usually NOT DOING ANYTHING!
By this, I mean you’re going to allow your stained leather item to dry and fade out naturally.
There are two main ways you could do it; that is to either continuously use the item or resting the leather item.
What I typically advice is to continue using the leather stained leather item if the stain doesn’t inconvinience you in any major way.
There are a couple of things you can do to help you when it comes to making sure the motor oil stain does not go a step further to destroy the structural integrity of the leather material.
Here are a few steps on what to do when your leather gets stained with motor oil so that the stain gradually fades away but quickly.
Things Needed:
- Paper towels or tissue papers
Procedure:
Step 1:
Blot out the motor oil stain.
While this will mainly depend on how much oil you got on your leather, you will want to use your paper towel, rag, or tissue paper to blot the motor oil stain.
You would want to do this as early and as fast as possible when the motor oil stain occurs.
You would want to gently blot by pressing the tissue paper or rag on the oil stain.
This will help to remove any excess motor oil residue.
Step 2:
Continue using the leather item until your next scheduled cleaning and conditioning routine.
Step 3:
Use! Use!! Use!!!
With time, the stain should fade and will not be very noticeable.
The motor oil stain together with the other different stains that the leather will build up will come together to form a unique character synonymous with your leather item alone.