
The pricking iron is one tool often confused with a few other piercing tools like the thonging chisels, stitching chisels, etc. Although very similar in look, but in function, the pricking iron is vastly different from the others. In this article, I did thorough research on the pricking iron, and here’s all I found.
What is a Pricking Iron?
The pricking iron is a tool you would use to make slanted stitch markings or guide onto the leather and the chief characteristics of this tool is that it does not pierce the leather all the way through, so, after the pricking iron is used to mark the stitches guides, you would need to use an awl to pierce the guidelines before stitching begins. But today, you will find them usually marketed as stitching chisels that can create holes.
The pricking iron is a hand stitching accessory and as the name implies, is only meant to prick the leather as a guide before stitching is done.
This makes the awl an essential accessory when using the pricking iron. The awl really plays a major role as you can use it in various forms when working with the pricking iron.
Without using an awl to pierce through the stitch markings you have made, it’s almost impossible to push the harness needle through the leather to stitch. You can also use the awl to regulate the depth to which you pierce the leather.
Both tools are not the simplest of tools to master right off the cuff and may take a bit of time and practice for you to figure out how to particularly position a pricking iron and an awl to pierce the leather after the pricking iron has been used to make the stitch markings.
The pricking iron comes in different designs, sizes, and metals mainly brass or stainless steel. They also come with different number of prongs ranging from a single prong to 6 prongs or more depending on the brand. Pricking irons are great tools for punching multiple symmetrical stitch markings as they’re already evenly spaced.
One important trick all leather crafters use and would readily tell you when it comes to the pricking iron is to always re-enter the last stitch mark to ensure the spacing between the holes you will subsequently create will are perfect.
Common issues you’re bound to face when you start out using a pricking iron is the likelihood of a couple of awls stabs to the fingers or crocked stitch marking, etc. But with time and constant use, this will be the best hand stitching tools you would need.
If you’re just starting out and do not already have an awl, I happen to run through some of my old purchases and found this stitching awl by C.S Osborne is still on sale on Amazon. It’s really cool and will serve you for a really long time.
Another important tool I will mention that is also key when using a pricking iron is the type of surface you choose to work on. There are several boards or mats I could recommend but the best surface I have found that works really good is 8-10mm leather. You can do this cheaply yourself at home with a couple of square feet leather and glue. All you do is to stack them on top on the other with the glue and you’d have the best type of surface for a pricking iron.
I see this to be the perfect type of surface to use with a pricking iron because in some cases, you would strike the iron and it will go all the way through and if you happen to have a hard surface like a granite plate, the teeth will hit the surface causing it to break and as a result, your pricking won’t last as long as it should.
Also, an important tip is to make sure the stacks of leather you put together are thick enough so that the pricking iron doesn’t go through it as well hitting the hard surface underneath. You can simply match the height of the teeth of the pricking iron to the thickness of the leather you’ve stacked to measure for a scenario should the pricking iron go through the leather board.
However, if you don’t want the trouble of making your own mat and to save you some time I found this polyethylene cutting on Amazon have the qualities that won’t cause damage to your pricking iron like the leather board. If you’re interested you can check out its price with the above link.
The next vital thing to set in place is a big hard solid support in the such as a granite marble slab or metal. This is important because when you strike the pricking iron and the board directly beneath it isn’t supported by a marble slab, the energy exerted will be transferred directly to the work workbench and will destroy it in no time.
This is one tool most leatherworkers will skip but if you’re reading this article right now, then there’s a chance you’re considering getting one to help with your stitching among other uses. I found this pricking iron for you to consider because it’s on the low price end unlike many others and has really great reviews about it. You should definitely check it out after you’re satisfied with how well it will serve your purpose.
How Do you Sharpen Pricking Irons?
Just like all other leatherwork tools, you can sharpen the pricking iron just like you would any other metallic or sharp leatherwork tools. But the main question is how do you sharpen a pricking iron especially with it’s prongs in the way.
Pricking irons are sharpened by gently stropping them over a leather stropping paddle. Mostly, you will strop both the flat front, back and sides of the pricking iron over the main parts of the strop paddle, while you will for the prongs on the edges of the stropping paddle.
Watch a Video on How to Sharpen the Pricking Iron
How to Use a Pricking Iron
Using a pricking iron for it’s main function of pricking guide markings on leather follows two basic steps.
First is to use a wing divider to mark a straight line or otherwise along which the stitches will be placed.
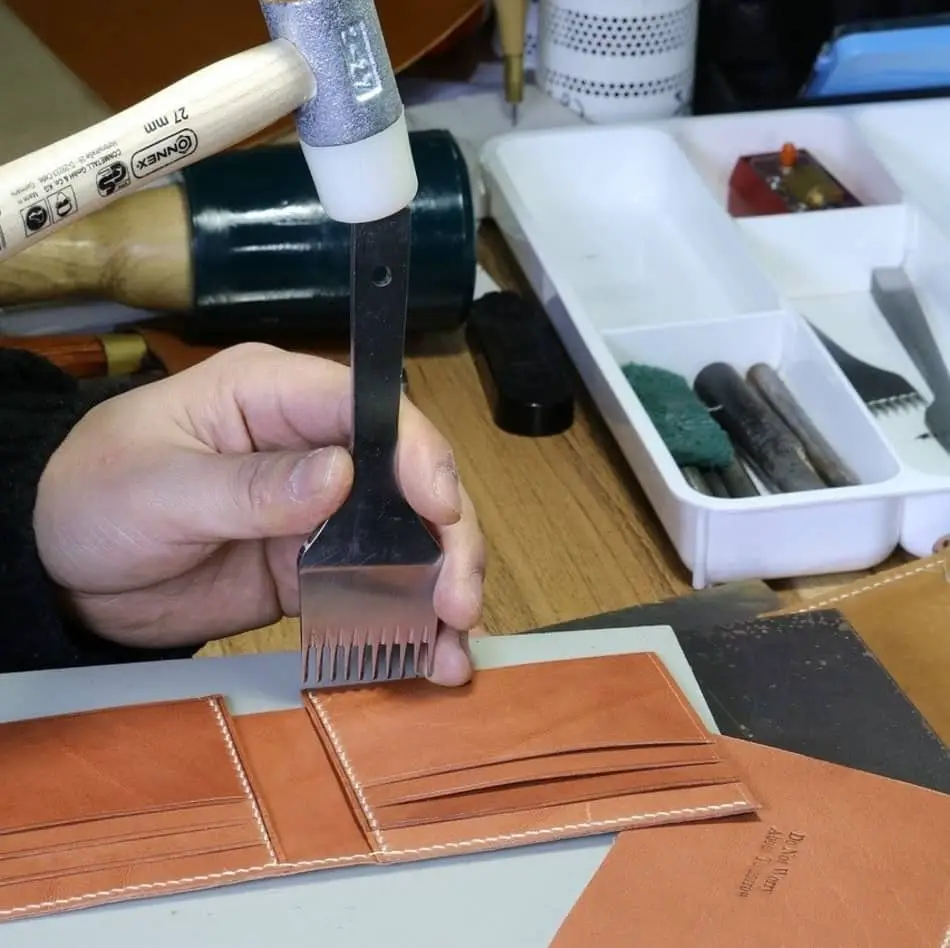
Secondly, with the help of a maul or raw hide mallet, you position the pricking iron along the line you marked on the leather and hit to prick the leather.
Always ensure to re-enter the printing iron in the last stitch mark you place with the pricking iron to make the stitches uniform, consistent and professional looking.
You can dip the tips of the pricking iron into a block of beeswax to make it prick nicely and smoothly. It will also work just fine without the beeswax.
The pricking iron can be applied in two ways at this stage. You can sink the pricking iron deeply or shallow. This can be done depending of the amount of energy you exert with the mallet or the number of strikes the pricking iron receives. While sinking the pricking iron deeply with multiple mallet strikes can alleviate the need to use an awl to pierce through the leather before stitching, it will however result in larger stitch marks.
With such large stitch piercings, requires the possible use of heavier threads which may otherwise not be so necessary or practical. This in turn could make the stitches really bulky. There may be other instances where large stitch piercings can however be practical.
On the other hand, with shallow piercings, any standard thread will sit in the stitch marking neatly and give the work a really nice stitch finish. In either case, make sure to shoot for what’s practical and serves your purpose.
Further, use the awl to prick through the stitch marks you made. This is when the pricking iron isn’t used to pierce through the leather.
Finally, you can start stitching (saddle stitching) through the hole you have made with the aid of the pricking iron.
Watch A Video on How to Use the Pricking Iron
Conclusion
All in all, while most people say the pricking iron is an unnecessary leather work accessory, I personally from experience see the pricking iron as a vital hand stitching accessory. It’s a really simple tool that require little maintenance and will serve you for years and years through out your leather work journey.