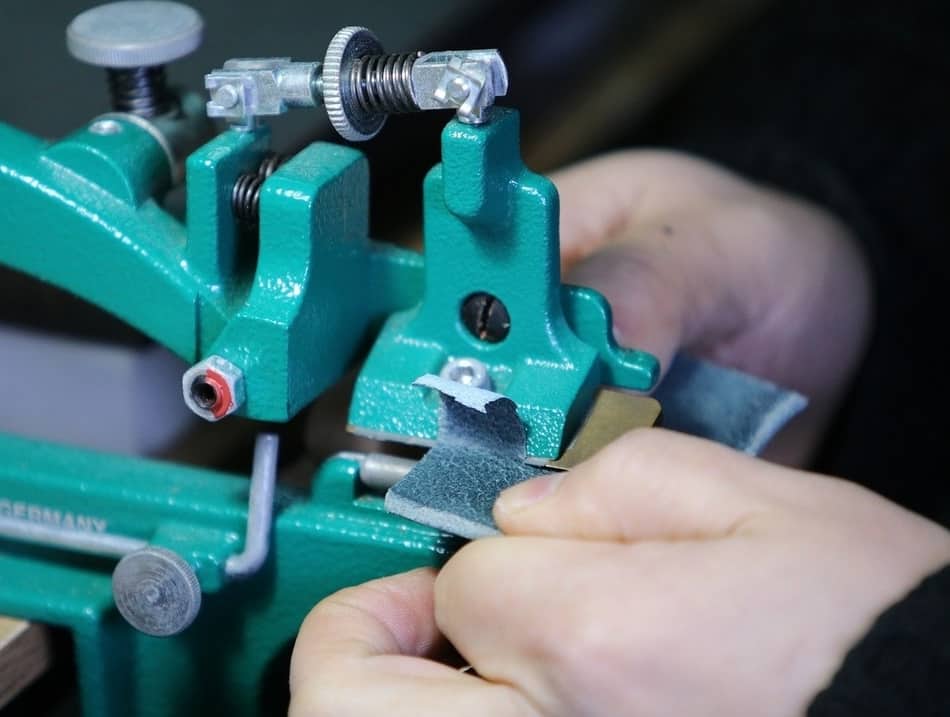
There are various parts that come together to make the invaluable leather skiving machine and so in this article, we outlined all the parts of the skiving machine and their functions. This we believe will help you understand the device better, how it works, and to understand what might be the problem when things go wrong.
So, what are the parts of the skiving machine? The basic parts of the skiving machine are:
- Bell Knife
- Sharpening Stone/ Grinding Stone/Wheel
- Pressure Foot/Presser Foot
- Pressure Foot Height Adjusting Screw
- Skiving Guide
- Bottom Feed Roller
- Leather/Material Release Lever
- Feed belts
- Belt cover
- Hand Wheel
- Waste Slide Tray and Metal Waste Bin
- Feed Roller
- Top Pressure Adjuster
- Front and Side Adjustment Knobs
- Top lever
- Bed
In addition to the listed parts of the skiving machine, we have also included details such as the description of what these parts are, their functions, and a whole lot more. Keep reading to find out more.
Details on The Parts of Skiving Machine
1. The Bell Knife:
The bell knife is a fast rotating circular knife that cuts the leather during skiving with its sharp rim. The bell knife is made with a special chromium alloy. It measures 12cm in diameter and 5.2cm in width with a knife adjusting lever. The bell knife is also marketed as a cylinder knife.
The name bell knife is gotten from how the knife is shaped which is like a bell or bowl shaped blade that looks like a bowl turned on its side with a very sharp rim.
The bell or bowl shaped knife is located facing to the operator’s left and rotates at a position away from the user. The bell knife is sharpened by engaging an inbuilt sharpener with a clutch lever called a grinding stone/a sharpening stone or wheel.
2. Sharpening Stone/ Grinding Stone/Wheel:
The sharpening stone or grinding stone is a round shaped and is as well a fast rotating stone driven by a belt which you would use to sharpen the knife of your skiving machine. It also has its Sharpening stone adjusting thumb nut.
The sharpening wheel or grinding stone is an built-in sharpener for a leather skiving machine and it matches the shape on the inside curve of the knife.
3. The Pressure Foot/Presser Foot:
The pressure foot is a replaceable component of the leather skiving machine. The type of skiving required with determine the size, design, and shape of the pressure foot you will want to use.
Meaning that the shape of the skiving can be changed by replacing the presser foot with a flat, slopped or U-shaped pressure foot.
The main function of the pressure foot is that it holds or presses down the leather as it is fed through the machine while it’s skived. The pressure foot can also be adjusted by changing the height of the foot to determine the width and angle of skiving you would want to do.
With a well adjusted pressure foot, you can just about reduce the thickness from the flesh side to just about the thinness of a paper.
You can check out an article I wrote earlier on pressure foot for skiving leather. It’s an article I wrote that focusses on the pressure foot for skiving machines.
4. Pressure Foot Height Adjusting Screw:
The pressure foot height adjusting screw is the main component that controls by turning height adjusting screw in a clockwise or anti-clockwise to obtain a required thick or thinner edge.
5. The Skiving Guide:
The skiving guide is a component you will find useful on the skiving machine as it’s locked in near the pressure foot and helps to determine the width of a skive when skiving leather.
It’s very easy to reset in a lock or unlocked position when the leather skiving machine is being set up. The guide is positioned forward to decrease the width of a skive and in a backward position to increased width of skiving.
6. Bottom Feed Roller:
Also called the button feed roller tension hook helps in feeding the leather by gripping it on the flesh side without causing any damage to it.
It has a tension enacted by a spring on the rare end of it’s hook. You can adjust this tension by moving it’s hook from one slot to another.
The tension created is important to hold the feed close to the knife.
7. Leather/Material Release Lever:
The leather/material release lever is called upon when there’s a Jam with the leather material. It’s a lever that releases the leather when it becomes jammed in the skiving machine.
With a simple lift up, the lever is released and you can then easily withdraw the leather from the skiving machine after which the lever can be returned to its original position.
8. Feed belts:
The feed belts are made and place to regulate the skiving machine feeding speed and knife speed. Examples of belts you will find includes knife drive belt, Feed roller drive belt, and the sharpening stone drive belt depending on the brand you buy. With the help of the pulleys of a feed roller drive belt, Speed adjustments can made easily.
9. Belt cover:
The belt cover is one of the safety features you will find in a skiving machine which basically used as safety covers to protect the operator from the skiving machines pulleys and belts.
10. The Hand Wheel:
When you get into working with a leather skiving machine, you will notice the from time to time, the leather will not move properly through the feed as it’s supposed to.
This can be an indication that the leather has become clogged in the blades of the skiving machine. In this case you can turn the hand wheel towards and away from you a few times to free up the machine moving the skived leather pieces into the waste slide tray.
11. The Waste Slide Tray and Metal Waste Bin:
The waste slide tray and metal bins collect shavings after skiving for either recycling or disposal of which I will personally prefer the former.
12. Feed Roller:
On the skiving machine, you will also find a feed roller. This part of the machine is a much slower revolving roller that is made up of an abrasive material, which guides the leather or material is to the edge of the knife.
The feed roller is not meant to touch the bell knife and pressure foot but only to guide the leather towards them.
13. Top Pressure Adjuster:
The top pressure adjuster as the name implies is used to set up the required amount of pressure on the leather that is skived.
The thickness and the kind of skive required will determine the amount of top pressure adjustments that will be made.
14. The Front and Side Adjustment Knobs:
Starting with the front side adjustment knobs, it’s located on the front side of the machine and comes with two simple knobs.
While the first knob controls the sharpening stone and it’s used to move it towards the bell knife and visa verse, the second frontal knob is connected to the bell knife and is used to move it from left or right or the pressure foot.
On the other hand, the side adjusting knob controls the feed roller assembly and with this knob, you can a set distance between the bell knife and feed roller.
Although the distance in this regard may vary, the minimum you would often set between the roller and the bell knife will not be less than 0.5 mm.
15. Top lever:
This is a lever connected to the top vertical pressure adjusting assembly and it’s function is to lift up the pressure foot when skiving.
16. The Bed
The bed is the surface area on the skiving machine where the leather sits after the skiving is complete. The bed should always kept free from tools and other materials.
Related Questions
How Does a Skiving Machine Work?
The Skiving machine is mounted on a work table and motor connected to the pulleys with the help of feed belts is fixed underneath the work table. When some sort of power is transmitted through via a foot paddle to the belt, the skiving machines’ mechanism begins functioning. A skiving machine will usually pull the leather through from left to right to skive.
Watch a Video on How to Make Adjustments to the Skiving Machine
How to Make Adjustments to the Skiving Machine
Adjustments can be made on a skiving matching through it’s knobs, levers, and adjusters. These knobs, levers, and adjusters can be turned clockwise or anti clockwise, raised or lowered, or moved forward or backward to perform different skiving functions.
Watch a Video on How to Make Adjustments to the Skiving Machine
How do you use a skiving machine?
The use of a skiving machine will basically require you to:
- Before starting to skive, ensure the sharpening stone isn’t in contact with the knife.
- Also ensure the pressure foot and knife isn’t touching the feed roller.
- Now turn on the switch of the skiving machine.
- Put you’re guide treadle in place.
- Hold your leather on the left side of the skiving machine with the grain side facing up and make sure the leather is placed according to the guide.
- Feed the leather straight through to skive.
- Finish off by ensuring no leather pieces aren’t stack in the machine by turning the hand wheel back and forth. Turn off your machine and voila! Yes

